

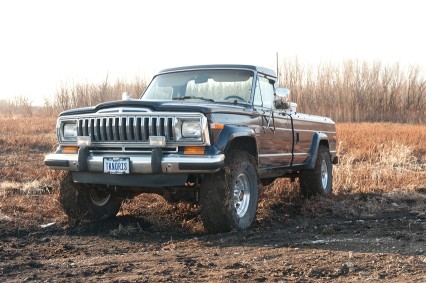
In the fall of 2011, I ran across a set of used J-20 axles from a 1984 model truck on an internet forum. I had been looking at ways to upgrade the truck and these fit the bill. From the factory, the J-10 comes with a standard duty Dana 44 in the front and a heavy duty AMC 20 axle in the rear. There's nothing wrong with these axles but their capacity falls a little short when you start doing heavy duty work with them. I plan on using this truck to tow my other Jeeps around the flatlands of the midwest. And when it comes to towing, you really want the capacity of a 3/4 ton truck. The foundation of that capacity lies in the axles. The J-20 came with a heavy duty version of the Dana 44 axle in the front along with a full float Dana 60 axle in the rear. The J-10 and J-20 share many common attributes, including location of the mounts for the springs and shock absorbers. This allows one to bolt the J-20 axles into a J-10 with little modification.
Because this truck is only going to be partially dedicated to towing, I wanted to improve not only the capacity of the truck but also the overall performance on and off road. This axle swap was just the first step. The steps that followed were to include an upgrade of the transmission to an overdrive unit. This future upgrade affected a couple of the decisions that I made on the details of the axle swap.
I knew that no matter what, I was going to have to buy new wheels and tires for the new axles. Not only did the lug pattern change from 6 on 5.5" to 8 on 6.5", the larger brakes on the 3/4 ton axles would not allow me to use a 15" rim so I would not be able to reuse the 31x10.50R15 tires that were on the truck. Like every project, the "as long as you're changing, now's the time to upgrade" philosophy applied. I knew I wanted to run a 35" tire. I did some digging on various tires and wheels. I settled on 315/75R16 Fierce Attitude MT tires. They're roughly 35" in diameter and would fit nicely in the wheel wells. For the wheels, I decided on American Racing AR23 in 16x9". They are large enough to clear the brakes and they have a classic look that suits the lines of the truck much better than a modern overly large wheel.
Now that I had the tires picked out, I needed to determine what else I was going to need to make them work. The first issue was getting them to fit in the fenderwells. The stock suspension was adequate for a 31" tire but a 35" would stuff too far into the wheel well. I needed a suspension lift. For that, I settled on a 4" Skyjacker Softride kit. It's not quite enough to be good for taking the truck off road with a lot of suspension articulation but that's not how I plan on using the truck. I'm not going to disconnect the front swaybar. I'm actually going to add a rear swaybar to improve stability for towing. These, along with some other modifications will keep the tires from pushing too far into the fender wells.
The next decision that was required was the gearing. The axles came with 3.73 gears. with the planned overdrive automatic transmission, those gears wouldn't work. They're too tall for 35" tires. I'd never be able to make any use of the overdrive. So they had to go. In their place I decided to swap in 4.56 gears. They're a good compromise for highway engine speed and low end grunt for towing. However, changing the gears in the front axle would mean I have to buy a new carrier for the front Dana 44. And that lead me to my next decision.
Now that I knew I was definitely going to change gears, I knew I was going to need to decide on lockers. As long as you're paying for the labor on the gears, the lockers can be installed for "free". So it was just a matter of deciding on which ones to use. I knew that I wanted something for the rear. No question. I knew that this truck will be primarily driven on the street so getting a locker with good street manners was mandatory. But I also wanted good traction out of it. So I settled on the Eaton E-Locker. It's a selectable locker that lets you switch from an open differential with excellent street manners to a fully locked differential for great traction with just the flip of a switch in the cab. In the front I wouldn't have put a locker except that I already had to pay for a new carrier to go with the new gears. So I was already going to spend several hundred dollars for that. The incremental costs of a locker weren't much in the grand scheme of things so I decided to put a locker there too. I thought about installing a Detroit locker in the front. The lockable hubs would let me run on the street with no side effects of running an automatic locker. But I also had to take into consideration how I was going to be using this truck. It's primarily street driven. I like to leave the wheel hubs locked in the winter so I can just shift into 4WD when I need to. And in the snow and ice of Iowa winters, the automatic locker can make handling tricky, even when in 2WD. So I decided to spend the extra money and go with an Eaton E-Locker in the front as well. That way I have the traction available when I want it but the street manners the other 99% of the time I'm driving the truck, whether I have the front hubs locked in or not.
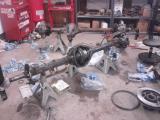
 When I bought the axles, they were in Texas, near where I used to live in Fort Worth. I knew the guy who was selling them so I felt comfortable
sending the money to my friend to buy the axles sight unseen. Another friend who works in a 4x4 shop there was able to pick up the axles for me
and take them directly to his shop to have the technicians install the gears and the lockers for me. He then put the completed axles, along with
the components of the lift kit and other assorted parts on to a pallet and had them shipped by truck freight directly to me. My work has a loading
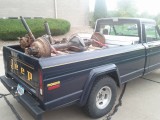
dock and they let employees receive shipments there, which saved me a ton on the actual shipping costs. Once the axles arrived, I loaded them up
into the back of the truck to haul them home. Once I got the axles home and unloaded from the truck I started to tear into them for the rest of
the work they needed.
The axles had been sitting out in the Texas sun for years so they weren't in fantastic shape. But since they were already taken out of the truck it was the perfect time to rebuild them. I started with the front axle. I started by replacing all 4 ball joints on the steering knuckles. I was attempting to replace the u-joints in the axle shafts but they were rusted in badly enough that I bent the ears on the shaft getting the joint out, along with breaking the bottle jack on my 20 ton shop press when the joint finally popped loose. So I just gave up on replacing the joints and orderd replacement axle shafts. And, as long as I'm replacing I'm upgrading. So I went with full chrome molly shafts. One other upgrade I decided on was the brakes. It turns out that GM copied the design of the outer knuckles on the Dana 44 axle when they designed their corporate 10 bolt axle they used in the 3/4 K20 pickup truck. This means that the parts are interchangable. They bolt right up. Since I was replacing the brake rotors anyway, I decided to use the heavy duty "JB7" brakes that were an option on the 3/4 ton Chevy. They're a larger diameter rotor with a bigger caliper and pads that bolts right on with no modification required. After I assembled all of that I bought all new ball joints and tie rod ends for the axle and put it together.

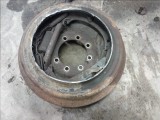 Once I had the front axle done, I moved to the rear. The first challenge was simply getting the brake drums off. They were decades old and had
sat out unprotected in the weather for years. They were hopelessly rusted on. None of the usual tricks would get them free. So I had to break out
the power tools. I resorted to cutting the drum to separate the center hub from the rest of it. Once I did that I was able to get the center
hub off and get at the internals. From there I was able to unbolt the entire brake backing plate from the axle tube and remove the brakes as a
single assembly. Needless to say, replacement parts would have been difficult to come by because of the rarity of the J-20. And if I did find
parts I'd still have second rate drum brakes. I wanted better. So instead of replacing, I upgraded.
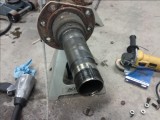 Once the brakes and rear hubs were removed I was able to start the disc brake upgrade. Because this Dana 60 is a full float design, it can take
advantage of the work that was done to make a disc brake upgrade kit for the full float GM 14 bolt axle. The kit is relatively straightfoward.
A custom bracket is made that holds a caliper from a 1978 Cadillac El Dorado. This caliper came with the provision for a parking brake in it
and it is the right size to fit the brake rotor from a 3/4 ton Chevy K20. The bracket bolts to the bracket on the axle tube, the brake rotor
attaches to the hub exactly the same as it would for a front rotor, and the hub is fitted (with new bearings all around). I cut off the metal
brake lines at either end and flared the ends so I could put a short flexible brake hose to the caliper. For some reason I can't find any pictures
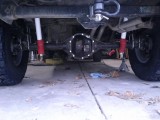
of the brakes installed on the axle but I did find a picture of the axle as it's installed and you can see the brakes from there.
Once the axles were rebuilt, I rolled the truck into the garage and did the swap. Because I was swapping the springs at the same time I was able to simply unbolt the springs from the frame and roll out everything as one assembly. After one axle was out, I bolted in the springs, pulled the axle in place and bolted them up. Once in place, I bolted up the shocks, the extended brake lines, reconnected the driveshafts, installed the drop pitman arm to help correct the steering geometry and hooked up the steering.
After bleeing the brakes I was able to take the truck out and give it a shakedown run. I ended up taking it to a local shop to power bleed the brakes to make sure all of the air was out of the lines. The truck performed flawlessly from the time of the install to when I started the next major upgrade. That being said, there's a couple of things I plan on changing.
The first change will be to finish wiring up the lockers. I ran the wires to the cab but they're not hooked up to any switches so they won't do me any good until I get that done.
The second change will be with the rear springs. They were designed for a shorter wheelbase Wagoneer so they came with a degree shim in the spring pack to point the pinion up a few degrees to accommodate the lift. In the longer wheelbase truck, the pinion sticks up too far. I want to remove the degree shim to get it to point back closer to it's original orientation. This will put a less severe angle on the u-joint on the pinion. It will also move the shock mounts so that I can possibly attach the shocks in the correct orientation. As it sits, the shock body hits the axle housing unless you run them upside down.
The third change will be to actually hook up the parking brake cables. Now that I've finished mocking up the overdrive transmission I know where the crossmember will be so I can measure for the cables I need to adapt the system.
But beyond that, I've been very happy with this upgrade. The entire stance and attitude of the truck is just better overall. The wheels and tires fit the style of the truck very well. Looking at the before and after comparison photos, I think most everyone would agree that the truck is much improved over factory stock.